How To Install WordPress Multisite With Different Domains

How To Install WordPress Multisite With Different Domains
 |
| WordPress Multisite | img src @roiamplified |
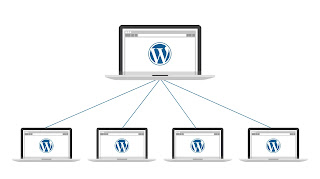
WordPress multisite enables one to install multiple/different websites in a single installation. With multisite installation, you could have different websites say site A & Site B in one installation while still being able to manage them from a single dashboard as a super admin. Each site admin can also manage their websites independently. Websites in a multisite network can share files like plugins and themes, hence, minimizing overall server resource usage.
Originally, WordPress only provides a means to install multisite using either a subdomain or subdirectory structure. To be able to bypass this limitation, we need to use domain mapping to install WordPress multisite with different domain.
Read on to learn how to do so:
1. Choose a hosting provider: Select a hosting provider that supports WordPress Multisite and allows you to add multiple domains. Some popular hosting providers that offer this feature include Namecheap, Interservers, Ionos, Bluehost, SiteGround, WP Engine & Hostens.
2. Install WordPress: Sign up for a hosting plan and install WordPress on your server. Most hosting providers offer a one-click installation process, making it quick and easy.
3. Enable WordPress Multisite: Once WordPress is installed, access your website's files through an FTP client or file manager provided by your hosting provider or from WP dashboard. Locate the wp-config.php file in the root directory of your WordPress installation, download it to your computer and open it in a text editor or open it up directly. Look for the line that says "That's all, stop editing! Happy blogging." Just above this line, add the following code:
``` define( 'WP_ALLOW_MULTISITE', true ); ``` Save the changes and upload the modified wp-config.php file back to your server if you downloaded it in step 3 above.
4. Set up Network: Log in to your WordPress dashboard. You should now see a new option called "Network Setup" under the "Tools" menu. Click on it to continue. On the Network Setup page, you will be presented with two options: - Sub-domains: This option allows you to create separate sites using subdomains, such as site1.example.com, site2.example.com. - Sub-directories: This option enables you to use separate sites as directories, such as example.com/site1, example.com/site2. Choose the option that suits your needs and enter the required information, such as the network title and admin email address. Click on the "Install" button.
5. Update wp-config.php and .htaccess files: After installation, WordPress will provide you with some codes that need to be added to the wp-config.php and .htaccess files. Access your website's files again and open the wp-config.php file. Locate the section labeled "/* That's all, stop editing! Happy blogging. */" and add the provided code just above it. Save the file and upload it back to your server. Next, download and open the .htaccess file in the root directory of your WordPress installation. Replace the existing WordPress rules with the provided code. Save the file and upload it back to your server. It is good practice to save an unmodified copies of this file in case something goes wrong.
6. Configure Domain Mapping: By default, the new sites in your WordPress Multisite will have URLs like mysite.example.com. To use different domains for each site, you need to configure domain mapping. To do so, install and activate a domain mapping plugin, such as "WordPress MU Domain Mapping" or "Domain Mapping". These plugins will allow you to map different domains to each site in your network. Configure the plugin by following the instructions provided by the plugin developer. Generally, you will need to add the necessary DNS records for each domain and configure the plugin settings accordingly.
7. Add Domains to Your Network: Once the domain mapping is configured, you can add new domains to your WordPress Multisite network. Log in to your WordPress dashboard and go to "Sites" -> "Add New" to create a new site. Fill in the required details, including the site address (domain) and site title. Click on the "Add Site" button to create the new site. Repeat this step for each domain you want to add to your network. That's it! You have successfully installed WordPress Multisite with different domains. You can now manage multiple websites using a single WordPress installation.
Was this post helpful, let me know your thoughts in the comment section. Don't forget to share this post with others too. Simply hit the share button below.


.png)


Post a Comment