3 Easy Ways To Install Intel x86 Emulator Accelerator (HAXM) - Hardware Accelerated Execution Manager

3 Easy Ways To Install Intel x86 Emulator Accelerator (HAXM) - Hardware Accelerated Execution Manager

HAXM is a cross-platform hardware-assisted virtualization engine (hypervisor), widely used as an accelerator for Android Emulator and QEMU.
If you are an android developer, you need not be told the importance of HAXM to android development. In fact in most cases, you can't run your app after development with HAXM installed on your computer.
Something I noticed is that Windows 10 does not automatically install HAXM during installation. Even when you try to install this tool via prompts from its unavailability windows, it still fails to install leaving the android developer in a frenzy mode, and unable to test or run their projects.
I recently encountered this challenge, and after fixing it, I now want to let those who may be facing a similar challenge know how to install the Intel HAXM (Intel Hardware Accelerated Execution Manager) from android studio.
Below are three methods you can use to install Intel HAXM on your computer - Windows PC, Mac, Linux and other operating systems. At least one of the following methods should work on your OS.
The first method I'll share is how to install intel HAXM using android studio.
Method 1: How to Install Intel HAXM Through Android Studio
To install HAXM, click "SDK Manager" icon from the tool bar in android studio, or click "Tools → SDK Manager"
Now click "Android SDK" then click "SDK Tools" on the upper tab. Now you'll see a list of tools and their status whether they are installed or not.
Tick the checkmark to the left of Intel x86 Emulator Accelerator (HAXM installer). Now click "Apply" or "Ok".
 |
| Tick the checkmark to the left of Intel x86 Emulator Accelerator (HAXM installer). Now click "Apply" or "Ok". |
Now you'll see a prompt with important details on package size, storage location, size after installation, and available disk size in storage location. Click OK.
 |
| Click 'Ok' |
Read and accept the license agreement, then click Next.
Configure emulator settings and maximum amount of RAM available to Intel HAXM and click 'NEXT'
Wait for the tool to install and click 'Finish' after the installation completes.
 |
| Intel HAXM successfully installed |
The next step is to run the HAXM installer manually from the HAXM directory.
Even though Android studio indicated that HAXM has been installed, you'd need to still install it using the installer extracted into the install directory.
Navigate to: <sdk install location>\extras\intel\Hardware_Accelerated_Execution_Manager
i.e.:C:\Users\user\AppData\Local\Android\Sdk\extras\intel\Hardware_Accelerated_Execution_Manager
Double click the installer and follow the prompts to install HAXM.
Congratulations! you've successfully installed Intel HAXM using android studio. Happy coding! Happy development!!
Manual Methods To Install Intel HAXM
Method 2: How to Install Intel HAXM using the Installer
In order to install intel HAXM using the installer, you'll need to download the installer first.
To download the installer, head to intel website and download the package. It is a zip archive hosted on GitHub.
You may want to install the latest release of intel HAXM. Click here to download the latest release.
Click the release you wish to download, then download the required installer package for your operating system. Older releases can also be downloaded via the link above.
Now that you've downloaded the intel HAXM installer package, you'd need to extract it using a file extraction/compression software like WinRAR, WinZip, and others.
After extracting the file, double click the installer to start installing intel HAXM (Hardware Accelerated Execution Manager on your computer.
Follow the screen prompts to fully install the software on your computer.
 |
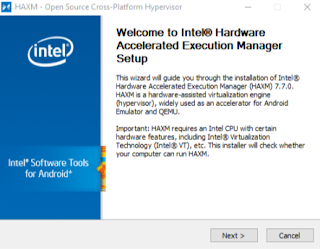
| Installing Intel HAXM using the installer. Click next to begin installing |
 |
| Click 'install' |
If your computer architecture is capable of installing the package, HAXM will be installed, and you should see a success message.
Method 3: How to Install Intel HAXM Using Silent Install (Silent_Install.bat, Windows Batch File) Via the Terminal or Command Prompt
This method is a little bit technical, but it is also one of the ways you can install HAXM to your computer - Windows PC, Mac OSX, Linux and other operating systems.
To use this method, you'll first download the installer package hosted on GitHub and fully extract it.
You'll then need to navigate to the folder containing the silent_install.bat via command prompt, Windows power shell or terminal in elevated privileges.
While in the folder, you'll then give the install command > silent_install.bat to begin installing HAXM to your computer.
To install using the installer in silent mode, you'll need to pass an /S which must be in uppercase in elevated command.
E.G:
> haxm-7.7.0-setup.exe /S
If all goes well, intel HAXM will install, and you should see a success message:
Intel HAXM installed successfully!
Congrats! you have successfully installed Intel HAXM. Those are 3 easy, quick and simple methods you can use to install Intel HAXM on your computer. Hope this solves the challenge of installing HAXM on your computer.
Have a brilliant day ahead!


.png)


Post a Comment